Live Video Streaming with Jetpack Compose and the Agora Android Video SDK
With vanilla Android people used to worry about the view-activity hierarchy, which often complicated the UI development for an Android application. Jetpack Compose solves this issue with Kotlin, a language that most Android developers are familiar with. Jetpack Compose is a reactive UI toolkit that simplifies and accelerates UI development. A developer who is familiar with Flutter or React will find a lot of similarities in the framework.
In this tutorial, we will follow the steps required to build a live video streaming application using the Agora Android SDK with the Jetpack Compose framework. Live streaming allows users to join the channel as either a host or an audience member.
Prerequisites
- Android SDK
- Android Studio Arctic Fox
- Agora developer account — Sign up here
Project Setup
- Open Android Studio, create a project, and select the Empty Compose Activity template:

2. Give a suitable name to your application and click Finish.
3. Add the necessary dependencies to your app-level Gradle file:
implementation "androidx.compose.material:material-icons-extended:$compose_version"
implementation 'io.agora.rtc:full-sdk:3.5.0'
4. Add relevant permissions to your AndroidManifest file.
<uses-permission android:name="android.permission.INTERNET" />
<uses-permission android:name="android.permission.CAMERA" />
<uses-permission android:name="android.permission.RECORD_AUDIO" />
<uses-permission android:name="android.permission.MODIFY_AUDIO_SETTINGS" />
<uses-permission android:name="android.permission.ACCESS_WIFI_STATE" />
<uses-permission android:name="android.permission.ACCESS_NETWORK_STATE" />
<uses-permission android:name="android.permission.BLUETOOTH" />
All done! Now let’s build our application.
Building Our Login Page
We will go ahead and make a simple UI for our login screen, which has two major roles:
- Read the channel name as a string input from the user.
- Read the user role (broadcaster or audience) as a radio button.
Building the Call Screen
After all the setup and building of our login page, we have everything we need to build our call screen. We will begin by adding user permissions for the camera and microphone. To do this, we are going to create a function UIRequirePermissions that checks whether the user has granted permissions for the camera and the microphone.
If permissions were granted, we move the user to our call screen. Otherwise, we show an alert screen for the user permissions.
Once we have created our function to check and request user permissions, we can call this function in our VideoActivity.
Based on the permissions status, we redirect to the call screen or the alert screen.
Alert Screen
The alert screen is responsible for getting the user’s camera and microphone permissions.
Call Screen
Once the user has accepted all the user permissions, they are redirected to the call screen, where we initialize the Agora Android SDK and set up our video call layout.
We begin by creating a variable remoteUserMap that maps the UID of a remote user to their TextureView:
var remoteUserMap by remember {
    mutableStateOf(mapOf<Int, TextureView?>())
}
After declaring this variable, we can create our initEngine function, which is responsible for initializing the Agora Android SDK and setting the channel profile to live broadcasting.
Inside this function, we set the client role based on the input received from the user at the login page.
With this, we have the complete setup required to make a video call. Let’s create the UI for our application.
We will have three main components in the UI for this project:
- Local user view
- Remote user view
- User controls (mute/unmute mic, disable/enable camera, disconnect the call)
To build our local view we are going to use AndroidView from Jetpack Compose. AndroidView() is a composable that can be used to add Android views inside a @Composable function. What that means is that you can simply use the existing Android classes instead of the compose equivalent.
You can style your local view however you want. But for the sake of simplicity, we are going to extend the local view to full screen. For the remote user, we are going to use a scrollable row that is displayed at the top of the user screen.
Here, remoteListInfo is nothing but the remoteUserMap that we have been maintaining. For the remote view, we are going to use a row that dynamically adds a texture view as a user joins a channel.
Once we have added the local view and the remote view, we have a complete live video streaming application. To add controls to our streaming platform, we will be adding a few basic features like:
- Mute/unmute stream
- Disable/enable camera
- Disconnect
And that’s it!
Conclusion
That’s how easy it is to make your live video streaming application using Jetpack Compose. If you have followed the code shared above, then you will have a final UI that looks something like this:
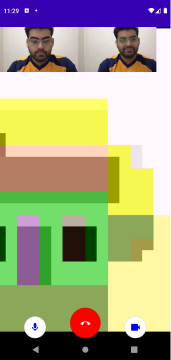
You can have a look at the complete code for this application here.
Other Resources
To learn more about the Agora Android SDK and other use cases, see the developer guide here.
You can also have a look at the complete documentation for the functions discussed above and many more here.
And I invite you to join the Agora.io Developer Slack community.